Ready to revolutionize your business communication and slash costs? Discover how effortlessly configuring a Grandstream ATA, like the HT814 or HT818, can unlock the full potential of FiberConX VoIP services. This comprehensive guide walks you through a seamless setup—from connecting your device to dialing in SIP settings—that transforms traditional analog lines into a modern, scalable VoIP system. Imagine porting your existing numbers, eliminating hefty landline bills, and maintaining familiar phones—all without hardware overhauls or disruptions. But the question remains: how can you ensure a flawless, stable connection behind routers and firewalls? The secret lies in precise NAT traversal and port forwarding, ensuring crystal-clear calls every time. With step-by-step instructions, troubleshooting tips, and the promise of significant cost savings, this tutorial is your gateway to a smarter, more efficient communication infrastructure. Are you ready to embrace the future of telephony?
Enhance Your Business Communication with FiberConX’s Advanced Phone Solutions
For Canadian businesses seeking reliable and feature-rich communication tools, FiberConX Communications offers top-tier Business Phone Service. Specializing in VoIP and IP-based phone solutions, FiberConX provides essential features such as voicemail, IVR, Ring Groups, and voicemail-to-mail, ensuring seamless connectivity and professional customer interactions. Whether you’re managing multiple departments or need efficient call routing, their services are tailored to meet diverse business needs. Contact FiberConX today at 1.800.961.6856 or email Sales@FiberConX.com to learn how their innovative communication solutions can boost your operational efficiency and customer satisfaction.
Seamless Transition: Unlocking Cost Savings with Grandstream ATAs and FiberConX VoIP
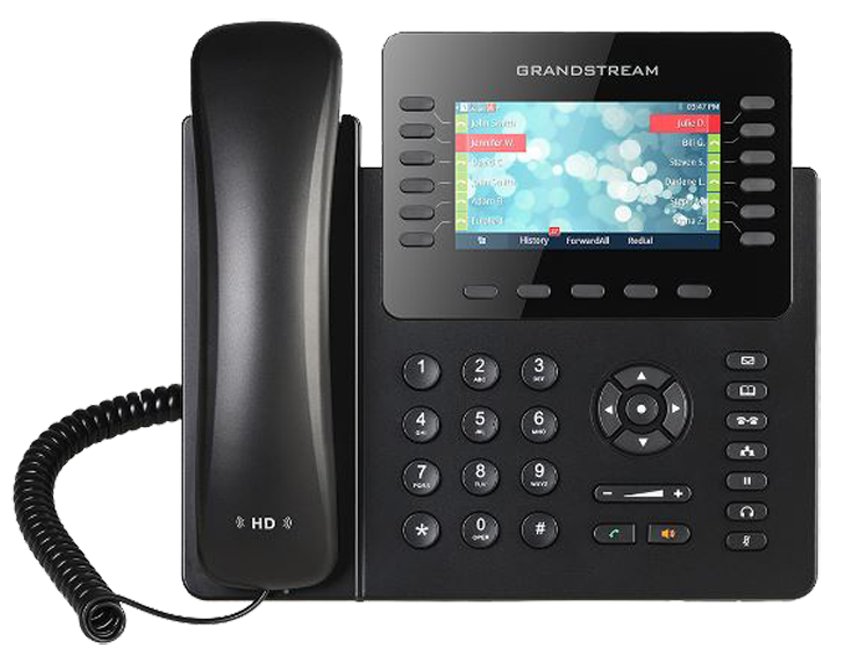
Grandstream ATA devices, such as the HT814 and HT818, are essential tools for transitioning from traditional landlines to modern VoIP systems. These adapters act as bridges, enabling analog phones to connect seamlessly with internet-based voice services. Designed with reliability and ease of use in mind, they are ideal for small businesses or organizations seeking a straightforward upgrade path without replacing existing hardware. Their simplicity allows users to convert analog signals into digital data, making it possible to make and receive calls over the internet without sacrificing familiarity or comfort.
Integrating FiberConX VoIP services with Grandstream ATAs unlocks a host of advantages. One of the most significant benefits is the potential for substantial cost savings. Unlike traditional landlines that often involve hefty monthly fees and long-distance charges, FiberConX leverages your internet connection to dramatically reduce these expenses. This shift not only cuts costs but also enhances operational flexibility—adding new lines or features becomes a matter of adjusting your account settings rather than installing physical lines, simplifying growth and scaling.
Retaining existing analog phones is another major advantage of this setup. Many organizations are hesitant to overhaul their hardware due to cost, training, and disruption concerns. With Grandstream ATAs, businesses can keep their familiar phones and avoid the expense and hassle of replacing hardware. The device handles the conversion process behind the scenes, ensuring high-quality, reliable call transmission. This approach minimizes downtime and training, making the upgrade seamless and non-disruptive.
Getting started with this setup is straightforward. The process begins with physically connecting the ATA to your network via Ethernet and powering it up. Once powered, verifying the device’s network connectivity is crucial. Most models offer a simple IVR menu accessible by dialing a code on your connected phone, which speaks out the device’s IP address. Confirming this early step helps prevent network issues that could impair registration or call quality later. A stable physical connection and proper IP address assignment set the foundation for a smooth configuration process.
Accessing the device’s web interface is the next step. Using a computer connected to the same network, open a browser and enter the IP address obtained earlier. Log in with default credentials, typically “admin” for both username and password, unless these have been changed for security. Once inside, you gain access to all configuration settings needed for a successful integration with FiberConX. Proper initial setup here is vital, as it ensures the device communicates effectively with the VoIP provider and your network environment.
Configuring the ATA to work with FiberConX involves setting the SIP server details, NAT traversal modes, and user credentials. Inside the web interface, navigate to the Profile 1 tab, where core SIP settings are entered. Input the FiberConX SIP server address carefully, including the port number if specified, usually port 5060. Setting NAT traversal to “Keep-Alive” is critical for maintaining a stable connection behind routers and firewalls, preventing call disruptions caused by dropped sessions. After entering these details, save the configuration.
The next step is to set up each analog line you plan to use. For each FXS port, input the specific User ID and password provided by FiberConX, ensuring accuracy to facilitate proper registration. Assign recognizable names to each port, such as “Main Office Line,” to keep your configuration organized. Confirm that each port is linked to the correct profile—typically Profile 1—and that all details are correct. Once configured, apply the settings and verify the registration status in the web interface or by dialing a code on the connected phone. Successful registration indicates the device is ready to handle calls over FiberConX.
With the device registered and configured, you’re prepared to enjoy the benefits of FiberConX VoIP. This setup allows you to port existing phone numbers, eliminate multiple service contracts, and reduce ongoing communication costs significantly. Transitioning from analog lines to VoIP is straightforward: update your number porting details with FiberConX, disconnect your traditional lines, and start making calls over the new system. The process is designed to be seamless, ensuring your organization maintains communication continuity while enjoying the cost savings and scalability that FiberConX provides. This combination of reliability, affordability, and ease of use makes it an ideal solution for organizations eager to modernize their telephony infrastructure without overhauling their existing hardware.
Preparation Essentials: Setting Up Your ATA for Smooth Configuration
Before starting the configuration process, ensure your Grandstream ATA device is physically connected properly. Use an Ethernet cable to connect the device’s LAN port directly to your router or network switch. For the most stable voice quality and reliable connection, wired networking is preferred over Wi-Fi, which can sometimes introduce instability or latency issues. Once connected, power on the device and wait for it to complete its boot-up sequence. The LED indicators will illuminate, signaling that the device is ready for setup. Confirming a solid physical connection at this stage sets a strong foundation for a trouble-free configuration.
The next critical step is verifying that your device has obtained a valid IP address from your network’s DHCP server. Without a proper IP, you won’t be able to access the web interface for configuration. To check this, pick up the analog phone connected to the ATA and dial *** followed by 02. The device will respond via IVR, speaking out its current IP address. If you hear the address clearly, your network connection is functioning correctly. If not, double-check your Ethernet connections, ensure your router is powered and configured correctly, and verify that DHCP is enabled on your network. Addressing these connectivity issues early helps prevent registration failures or call quality concerns later on.
Once you have the IP address, access the ATA’s web interface from a computer on the same network. Open a web browser, type the IP address into the address bar, and hit Enter. You will be prompted to log in; the default username and password are typically “admin” unless they’ve been changed for security reasons. Logging in gives you access to all configuration options necessary for a successful setup. It’s advisable to change the default credentials to a strong, unique password once you’re logged in, especially if the device is accessible over the internet, to enhance security.
Inside the web interface, locate the main configuration sections relevant to your setup. The Profile 1 tab is where you’ll input your SIP server details and network settings. Before proceeding, review your network environment to ensure your firewall and router aren’t blocking essential SIP and RTP ports, commonly 5060 for SIP and a range for RTP. If your network has strict security measures, consider opening these ports or enabling SIP ALG to facilitate smooth SIP communication. Proper network readiness at this point is vital for avoiding common issues such as one-way audio, dropped calls, or registration failures.
Gather all necessary information provided by FiberConX or your VoIP service provider. This includes the SIP server address, port number, your unique User ID, and the associated password for each line you plan to register. Organizing these details beforehand prevents delays during setup. Having this information at hand allows you to accurately enter the credentials into the web interface, ensuring your ATA can register successfully with FiberConX’s servers. Double-checking these credentials before input minimizes troubleshooting later and streamlines the entire process.
Pay special attention to the network settings within the device. Set the NAT traversal mode to “Keep-Alive,” which ensures your device maintains a stable connection behind routers and firewalls. This setting helps prevent call drops and audio issues caused by inactive sessions being terminated by network devices. After making these adjustments, click Save or Apply to implement the changes. A stable NAT traversal configuration is crucial for reliable VoIP calls, especially if your network employs strict security policies or has multiple layers of NAT.
Finally, verify your device’s network status and IP address once again. Dial *** followed by 02 to listen for the IVR message and confirm that the spoken IP address matches what you see in the web interface. Check the registration status indicator in the web interface to confirm your device is online and registered with FiberConX. If registration is unsuccessful, revisit your SIP server details, credentials, and NAT settings. Correct any discrepancies and repeat the registration check until the device displays a successful registration message. This thorough initial setup ensures your ATA is fully prepared for seamless integration with FiberConX VoIP, paving the way for a smooth, cost-effective communication upgrade.
Step-by-Step Guide: Configuring Your ATA for Optimal FiberConX VoIP Performance
To configure your Grandstream ATA for FiberConX VoIP, start by accessing the device’s web interface through a browser. Enter the IP address you previously retrieved into the address bar and log in using the default username ‘admin’ and the password specified in your device’s documentation. Once logged in, navigate directly to the Profile 1 tab, which houses the core SIP settings necessary for your setup.
Begin by entering the FiberConX SIP server address into the Primary SIP Server field. Ensure you include the correct port number if provided, typically 5060, to establish a reliable connection. Next, locate the NAT Traversal setting and set it to “Keep-Alive.” This option maintains your connection behind routers and firewalls, preventing call drops caused by inactive sessions. After completing these entries, click Save or Apply to activate the basic SIP profile configuration.
Next, move to the FXS Ports tab, where each analog line is individually configured. For every port you plan to activate, input the specific User ID and password supplied by FiberConX. It’s crucial to enter these credentials exactly as provided to ensure proper registration. Assign a clear, recognizable name to each port, such as “Main Office Line” or “Reception,” which helps keep your configuration organized and easy to manage.
Ensure each port is linked to Profile 1 or the profile you’ve just configured. Double-check that all entered details—User ID, password, and server address—are correct before proceeding. Once you’ve reviewed the information, click Apply to initiate registration. You’ll see a visual indicator, often a blue phone icon, confirming that the line has successfully registered with FiberConX. If registration fails, revisit your credentials and network settings before trying again.
It’s wise to verify your device’s registration status after configuration. Using the web interface, confirm that the registration indicator shows a successful connection. Alternatively, pick up the analog phone connected to your ATA and dial *** followed by 02; listen for the IVR, which will speak out the current IP address. Confirm that this matches the IP shown in the web interface. If the IP address isn’t correct or registration isn’t confirmed, troubleshoot by checking your credentials and NAT settings.
Adjust your NAT traversal further if issues persist. For instance, if you experience one-way audio or dropped calls, revisit the NAT mode and port forwarding rules on your router. Forward ports 5060 for SIP and a range for RTP as specified by FiberConX. Ensuring these ports are open and properly routed is essential for maintaining high-quality, uninterrupted calls. Testing outgoing and incoming calls after adjustments helps confirm your configuration’s stability.
Once registration is confirmed and your network settings are optimized, you’re ready to replace your traditional analog lines with FiberConX VoIP service. Update your number porting details with FiberConX, then disconnect your analog lines from the PBX. Your ATA, now fully configured, will handle all calls seamlessly, providing a straightforward, cost-effective upgrade to your existing system. This transition not only saves money but also enhances flexibility, scalability, and overall communication efficiency.
With your ATA configured properly, you now have a reliable, scalable VoIP setup that leverages FiberConX’s robust infrastructure. Enjoy the benefits of clear, high-quality calls, reduced long-distance charges, and the ability to easily add new lines or features as your organization grows. The process is straightforward, and once complete, it offers a significant upgrade from traditional telephony—simple, efficient, and ready to serve your communication needs effectively.
Once your FiberConX VoIP service is fully operational, it’s important to ensure ongoing optimal performance. For advanced setup options and troubleshooting tips, you can explore more about how to optimize your VoIP system by visiting VoIP Optimization Tips. This resource provides valuable insights to help you maintain high call quality and reliable connectivity as your system scales.